
YGameDev
Some simple manipulations can achieve the desired "painting" (pattern/data shape).
Before we start, there`s a very important consideration about performance:
-Everything that is pre-calculated is better than make real-time calculations.
-Less calculations are better then more calculations.
What that means is that some examples here can be replaced by a single texture (Grayscale image or a single channel from a colored image) in order to reduce the amount of processing. So, before create a shape into your code, make sure that it can`t be replaced by an image created on Photoshop.
There`s tons of options on shader forge and hundreds of commands in any shader language. In order to simplify things, I`ve created 5 groups that encopasses the most useful commands.
Painters
Noise
Depth
Fresnel
Time
Proj. Params
Scrn. Params
Object Scale*
UV Coord*
World Pos*
Object Pos*
View Pos*
Lerp
Blockers
Reciprocal
Posterize
Clamp
Ceil
Floor
Sign
Trunc
Round
Step(A<=B)
Shifters
OneMinus
Negate
Sin
Cos
Tan
ArcSin
ArcCos
ArcTan
ArcTan2
Sqr
Lerp(Simple)
Mixers
Min
Max
Add
Divide
Multiply
Lerp
Smoothsteps
Power
Distance
Transformators
Comp Mask
Append
HSV To RGB
RGB to HSV
Desaturate
Length
Remap
-Painters generates our initial patterns, usually gradients. (*Have single channels exposed)
-Blockers are structures to cap or simplify a gradient.
-Shifters are structures used to change a grayscale gradient into something else.
-Mixers are structures to visually mix different results.
-Transformators are special structures and should be explored one by one.
In general we can think on that as a simple puzzle game. Our objective is to get initial shapes using Painters and modifying these painting using Blockers, Shifters and Mixers until reach the desired "painting". Transformators can be used to change data format.
Over the next lines you will see some examples of that mechanism.
Painters
In order to illustrate the main point here, we gonna need a painter to generate a simple grayscale gradient. In a real case will be much easier and cheaper to import our gradient from photoshop but here the fun part is the challenge of paint whatever we want without use an external software.
UV Coord is usually known as the coordinate from a vertex in a 3d coordinate into an image in a 2d coordinate and is used in a process called mapping. Mapping is when a 3d artist specify how a texture should wrap a 3d geometry but, here, we gonna use the UV coordinate with other purpose. We gonna use this two dimension not to carry a coordinate but to generate a color. Fortunately, Shader Forge help us to visualize the UV as colors.

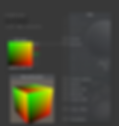
You may observe that "U and V" are actually two values as "X and Y" or "Red and Green" as well.
Taking each value individually we have an vertical and an horizontal grayscale gradient. ;)


As the UV coord, others painters from our list have single channels (grayscale channels) exposed on Shader Forge.
Blockers
Using blockers, we can rip off some data from our gradients. Here I`ve use the Round node so values < 0.5 are rounded to 0(Black) and values >= 0.5 are rounded to 1(White)

Remember: White <= 0. Black >= 1. Grays are values between 0 and 1.
Shifters
Shifters are simple mathematical operations capable of transform our current gradient into something else. Simple shapes can be achieve using shifters over painters.
Here I`ve used Length (a Transformator) into a UV Coord in order to create a gradient going from (0,0) to (1,1).
On other case, I`ve used a Comp. Mask (a Transformator) in order to decompose UV into two single channels R and G (Yes, I could also take this values from the UV Coord. but we already learned that).
I`ve also used Remap(another Transformator) in order to expand our range from (0,1) to (-1,1) obtaining a more interesting pattern
Over all case values, I`ve applied all sort of shifter.
At the end, I`ve used round in order to demonstrate how our range of values can increase fast.


Mixers
Mixers are nodes with the awesome capacity to make operations using two or more different images. I like to think on mixers as layers on Photoshop with different blend types.
Actually, there`s a node with exactly that interpretation called "Blend".

You to use an operator several times, actually, that`s extremely useful to create variations on a grayscale as attenuations, extrapolations or increase the contrast between light-grays and dark-grays.

Transformators
Transformators are the nodes that can really transform a thing into another thing. We already used some of then on the previous examples but let take a second look here.
Comp Mask can separate channels so you can manipulate it as a grayscale while Append do exactly the contrary and assign single channels into a multi-channel data.
Convert between RGB and HSV formats can give you control over all color spectrum controlling Hue, Saturation and Values intead of deal with RGB.
Desaturate can help you to create grayscales from colors.
Using Length you can access the magnitude from a given structure, an awesome grayscale source!
Let see some interesting stuff using everything that we saw until now.
The first example creates a gradient starting from the pivot point to the edges. (The schema could be smaller if I used the node "Distance" instead of "Subtract" + " Length").

This example creates a gradient from the camera to some distance with a controllable falloff. A the end I`ve inverted the gradient so the white part is near and the dark one is far. This shader works pretty much like a fog but can be used for many different purposes.

More grayscale examples coming...